DNS Guide for Beginners: How to Connect Your Domain to Hosting
DNS sounds technical, but it is basically the system that tells the internet where your website lives.
If you bought your domain from somewhere like IONOS, but your hosting is with WPX, you need to connect the two together.
Think of it like this:
Domain = your website address
Hosting = where your website files live
DNS = the directions that connect them
What we are doing in this guide
In this guide, you’ll learn how to:
- Find your hosting nameservers
- Add them to your domain provider
- Connect your domain to WPX hosting
- Wait for DNS changes to update
- Check your website is working
Step 1 — Log in to your hosting account
First, log in to your hosting provider.
In this example, I use WPX Hosting.
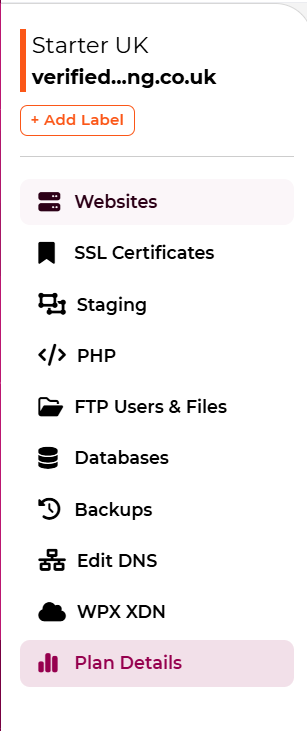
Once inside your WPX dashboard, find the hosting account for your website.
You are looking for your domain name, for example:
yourwebsite.co.uk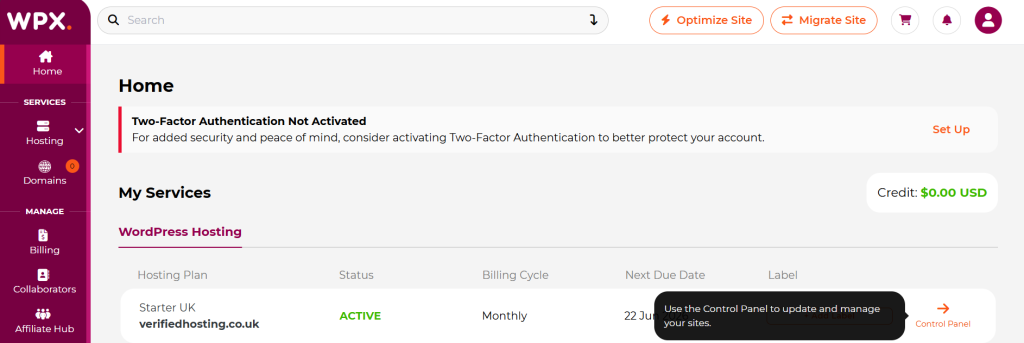
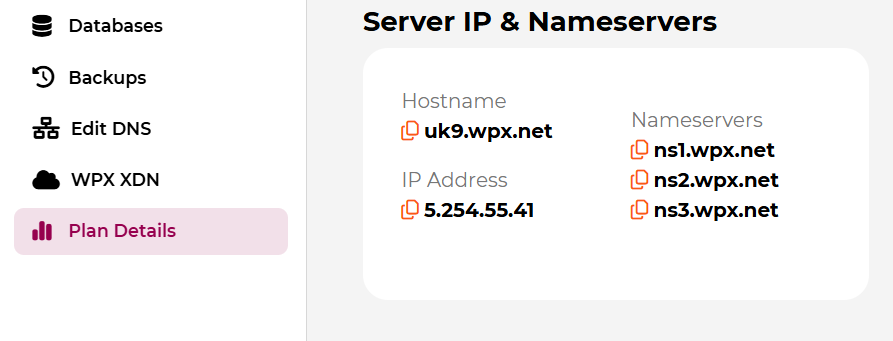
Step 2 — Find your WPX nameservers
Your hosting company gives you nameservers.
Nameservers tell your domain:
“This website is hosted over here.”
For WPX, the nameservers usually look like:
ns1.wpx.net
ns2.wpx.net
You may see them inside your WPX control panel, welcome email, or hosting details.
Important
Always copy the nameservers exactly.
Even one small typo can stop your website from connecting properly.
Step 3 — Log in to your domain provider
Now go to the company where you bought your domain.
Examples:
- IONOS
- GoDaddy
- Namecheap
- 123 Reg
- Cloudflare
For this guide, we’ll use IONOS as the example.
Log in and go to your domain dashboard.
Find your domain name, then look for:
DNS
Nameservers
Name Server Settings
Domain Settings
Different companies name it slightly differently, but you are looking for the section that controls nameservers.
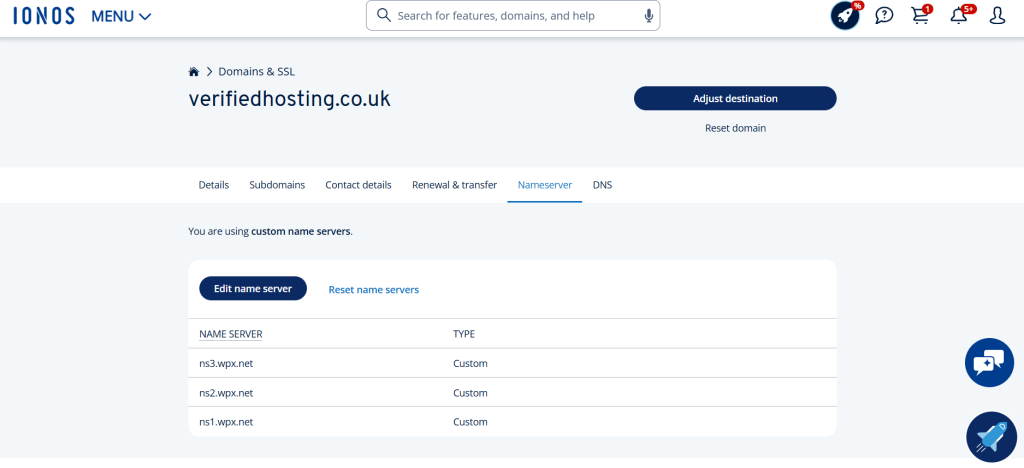
Step 4 — Change your nameservers
Once you find the nameserver settings, choose the option to use custom nameservers.
Then enter the nameservers from WPX.
Example:
Nameserver 1: ns1.wpx.net
Nameserver 2: ns2.wpx.net
Then click:
Save
Update
Apply
Confirm
Your domain is now being pointed towards WPX.
Step 5 — Wait for DNS to update
DNS changes are not always instant.
Sometimes they update in a few minutes.
Sometimes they can take several hours.
In rare cases, it can take up to 24–48 hours.
This delay is called DNS propagation.
Plain English:
The internet needs time to learn where your website now lives.
Step 6 — Check if your website is connected
After a short wait, type your domain into your browser:
https://yourwebsite.co.ukIf everything is working, your site should load.
If WordPress is installed, you should see your website.
If WordPress is not installed yet, you may see a holding page or hosting message.
That’s normal.
Step 7 — Install WordPress after DNS is connected
Once your domain is connected to WPX, you can install WordPress.
In WPX, go to your website control panel and choose:
WordPress
Install WordPress
After installation, bookmark your login page:
yourwebsite.co.uk/wp-adminThis is where you manage your website.
Step 8 — Set up SSL after DNS is working
Once your domain is connected, you should install SSL.
SSL gives your website the secure padlock:
https://WPX includes free SSL, so you can install it from the SSL Certificates section inside WPX.
This helps protect your website and makes it look more trustworthy.
Common DNS mistakes beginners make
Mistake 1 — Editing the wrong DNS area
If you are changing nameservers, you do this inside your domain provider, not WordPress.
Example:
If your domain is with IONOS, change nameservers inside IONOS.
Mistake 2 — Typing nameservers wrong
Wrong:
ns1.wpx.comCorrect:
ns1.wpx.netAlways copy and paste.
Mistake 3 — Expecting it to work instantly
DNS can take time.
Give it a few hours before panicking.
Mistake 4 — Changing too many records at once
If you are unsure, only change the nameservers first.
Do not randomly delete DNS records unless you know what they do.
Quick DNS checklist
Before moving on, check:
✅ Domain purchased
✅ Hosting account active
✅ WPX nameservers copied
✅ Nameservers added to domain provider
✅ DNS saved
✅ Waited for propagation
✅ Website loads
✅ WordPress installed
✅ SSL installed
✅ /wp-admin bookmarked
Simple explanation
DNS is just the connection between your domain and your hosting.
Your domain is the address.
Your hosting is the house.
DNS tells visitors where the house is.
Once that connection is done, your website can go live properly.
Helpful next steps
After setting up DNS, you should:
- Install WordPress
- Set up SSL
- Install essential plugins
- Create your homepage
- Set up business email
Recommended tools
I use:
- IONOS for domain registration
- WPX Hosting for hosting
- WordPress to build the website
- Google Workspace for business email
Affiliate note
Some links on this website may be affiliate links. This means I may earn a commission if you choose to buy through them, at no extra cost to you.
I only recommend tools I actually use or believe are useful for beginners.